HTTP Methods
Requestly supports all standard HTTP methods for API requests:- GET
- POST
- PUT
- PATCH
- DELETE
- HEAD
- OPTIONS
GET retrieves data from a server. It’s the most common method for fetching resources.Use cases:
- Fetch user data
- Get list of items
- Retrieve resource details
Setting Up Your Request URL
The request URL specifies where your API request should be sent. It consists of several components: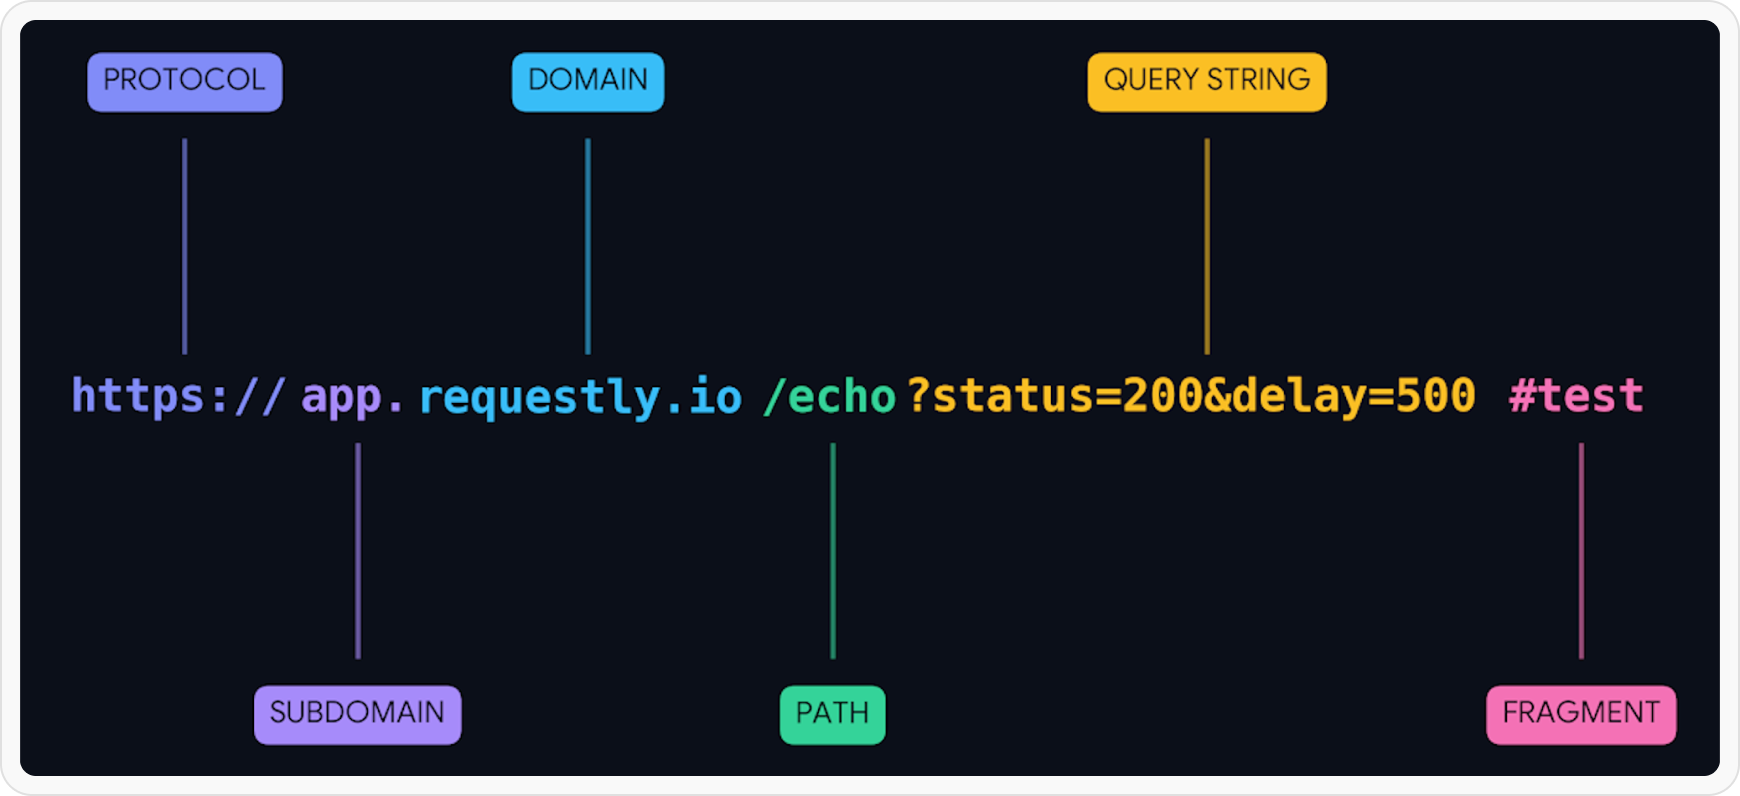
Naming Your Request
Give your request a clear, descriptive name to easily identify it later: Good naming examples:Get User ProfileCreate New OrderUpdate Product InventoryDelete Customer Account
TestRequest 1API Call
Sending Your Request
Once you’ve configured your request:Save Your Configuration
Click the Save button to preserve your request settings. This allows you to reuse it later without reconfiguring.
Click Send
Press the Send button to execute the request. Requestly will display the response in the panel below.
Review Response
Check the response status code, body, and headers to verify the request was successful.Common status codes:
200 OK- Success201 Created- Resource created400 Bad Request- Invalid request401 Unauthorized- Authentication required404 Not Found- Resource doesn’t exist500 Server Error- Server-side issue